SharePoint Online storage?

Customers are frequently asking what kind of storage they get with SharePoint Online and Microsoft constantly improves products and services. According to the latest informations, we have the following model (example on E plans):


Each Tenant (SharePoint Online instance) gets 1TB of storage space included. Then each user of the E plans will add 500MB of storage space into the shared pool. This is up from 10GB per tenant and 500MB per user.

  • For example:  A client with 100 users would get 1TB + 50GB (500MB x 100) for the main storage on SharePoint. Each extra GB is 0.20 per month.

The pooled storage is used across all sites on SharePoint Online, Office 365 Groups and Office 365 Videos

Enable XML attachments on Exchange Online

    1. Right click on the PowerShell Console icon and chose the option: Run as administrator.
    2. To change the Execution policy open the Microsoft Online Services Module for Windows PowerShell and type the command:
      Set-ExecutionPolicy unrestricted
    3. For creating the remote connection we will need to use  a set of three PowerShell commands. Each command perform different task and include variable that serve as a “container” for information such as: user credentials, URL etc. Execute the following command: 
      $cred = Get-Credential
      $Session = New-PSSession -ConfigurationName Microsoft.Exchange -ConnectionUri https://ps.outlook.com/powershell/ -Credential $cred -Authentication Basic –AllowRedirection
      Import-PSSession $Session
    4. A pop out windows will appear. Type your credentials by using the UPN (user Principal name) format. User should have global administrator rights in the office 365 environment. To view all the allowed file type, you can use this command:
      (get-OwaMailboxPolicy OwaMailboxPolicy-Default).AllowedFileTypes
    5. To allow a specific file type (such as .xml file), use this command: 
      Set-OwaMailboxPolicy OwaMailboxPolicy-Default -AllowedFileTypes  @{add= '.xml'} Get-OwaMailboxPolicy | Set-OwaMailboxPolicy -BlockedFileTypes @{Remove = ".xml"}
      Get-OwaMailboxPolicy | Set-OwaMailboxPolicy -AllowedFileTypes @{Add = ".xml"}
      Get-OwaMailboxPolicy | Set-OwaMailboxPolicy -BlockedMimeTypes @{Remove = "text/xml", "application/xml”}
      Get-OwaMailboxPolicy | Set-OwaMailboxPolicy –AllowedMimeTypes @{Add = "text/xml", "application/xml”}
    6. Disconnect the remote connection with the following command:
      Remove-PSSession $Session

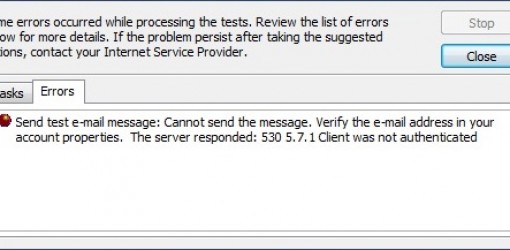
530 5.7.1 Client was not authenticated

Exchange Online implementation for new customers also includes local Outlook settings in order to send/receive messages from desktop application. Few days ago, users have reported the following error: “530 5.7.1 Client was not authenticated” during account setup in Outlook 2010/2013.

This kind of issue is cause by incorrect SMTP authentication setting.


  1. From the File menu, select “Info” and choose “Account Settings”
  2. Select your account and click the “Change” button above.Click the “More Settings…” button in the bottom-right corner of the E-Mail Accounts window.
  3. In the Internet Email Settings window, click the “Outgoing Server” tab.
  4. Ensure that the box next to “My outgoing server (SMTP) requires authentication” is checked and “use same settings as my incoming mail server” is selected.


Messages sent from a shared mailbox aren’t saved to the Sent Items folder of the shared mailbox in Outlook 2013

SOLUTION:

  1. Click Start, click Run, type regedit, and then click OK.
  2. Locate and then click the following registry subkey:
    HKEY_CURRENT_USER\Software\Microsoft\Office\15.0\Outlook\Preferences
  3. On the Edit menu, point to New, and then click DWORD Value.
  4. Type DelegateSentItemsStyle, and then press Enter.
  5. Right-click DelegateSentItemsStyle, and then click Modify.
  6. In the Value data box, type 1, and then click OK.
  7. Exit Registry Editor.

Outlook.com IMAP Mail Server Settings

Account type: IMAP
Incoming mail server: imap-mail.outlook.com
Outgoing mail server (SMTP): smtp-mail.outlook.com


Logon Information:
User Name: your @outlook.com email address
Password: your @outlook.com password


Then click on the “More Settings” button:
Outgoing Server tab: mark the box “My outgoing server (SMTP) requires authentication” and select “use same settings as my incoming mail server”.


Advanced tab – Server Port Numbers:
Incoming server (POP3): port 993
– you must also mark the box “this server requires an encrypted connection (SSL)”
Outgoing server (SMTP): port 587
– you must also choose “TLS” for the option “Use the following types of encrypted connection”.