Limits on syncing OneDrive for Business

  • You can sync up to 20,000 items in your OneDrive for Business library, including folders and files.
  • You can sync up to 5,000 items in site libraries, including folders and files.
  • In any library, you can download files up to 2 GB.

WFC connection problem in SPD2013

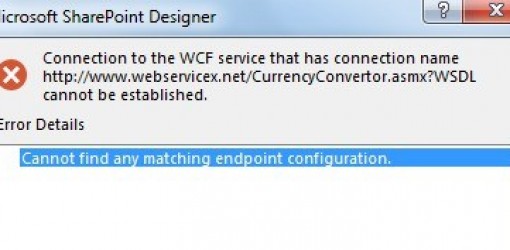
In Microsoft SharePoint Designer 2013, an external content type against a WCF service could show the following error:

Unknown Error occurred. Unable to load one or more of the requested types. Retrieve the LoaderExceptions property for more information.

Reason? This issue occurs because the DLL version that’s returned form the server doesn’t match the one in SharePoint Designer 2013.

Solution? Replace the content of C:\Program Files (x86)\Microsoft Office\Office15\spdesign.exe config file with the following code:

<?xml version="1.0" ?>
<configuration>
 <startup>
  <requiredRuntime version="v2.0.50727" />
  <supportedRuntime version="v2.0.50727" />
 </startup>
<runtime>
 <assemblyBinding xmlns="urn:schemas-microsoft-com:asm.v1">
  <dependentAssembly>
   <assemblyIdentity name="Microsoft.BusinessData" publicKeyToken="71e9bce111e9429c" culture="neutral" />
   <bindingRedirect oldVersion="16.0.0.0-65535.65535.65535.65535" newVersion="15.0.0.0"/>
  </dependentAssembly>
 </assemblyBinding>
</runtime>
</configuration>

Cannot find any matching endpoint – WCF connection in SPD2013

When creating a WCF connection in SPD 2013, you may face the problem with the following error: “Cannot find any matching endpoint configuration”. The problem is service endpoint URL address.

If you are connecting to ASMX based web service, the “Service Endpoint URL” is the ASMX service url. For example, if the ASMX service is hosted at http://server/service.asmx then the values for “Service Metadata URL” and “Service Endpoint URL” are as follows:

Service Metadata URL – http://server/service.asmx?wsdl
Service Endpoint URL – http://server/service.asmx

How to create email alias in Office 365 Small Business Premium?

1) Log into the admin center with the admin account.
2) Click the “Outlook” tab in the top panel to enter OWA (Outlook Web App).
3) In the address bar, change the URL after “owa” to “ecp”. For example, if the URL of your Outlook Web App is https://server.outlook.com/owa/?exsvurl=1&ll-cc=1033&modurl=0&realm=domain.onmicrosoft.com, please change it to https://server.outlook.com/ecp/ to enter your Exchange admin center.
4) Click recipients on the left navigation.
5) Click mailbox on the right panel and double-click the display name of the mailbox you want to edit.
6) Click email address on the left navigation.
7) Click add icon to add an email address for this account.

Empty Inbox issues in Outlook 2013

It seems that IMAP in Outlook 2013 is only getting worse, when will it get better and how to fix issues?


Some IMAP servers branch of all your folders from the Inbox folder. In that case, you’ll need to set the the “Root folder path” property in your account configuration.


Finding out whether or not this is required for you is quite easy. Select the Folder tab in Outlook, click on the button IMAP Folders and then click the Query button. If all folders start with a common name followed by a dot, then that first part is your root name.


To set the root folder path for your IMAP account:


  1. File-> Account Settings-> Account Settings…
  2. Double click on your IMAP account.
  3. Button: More Options…
  4. Tab: Advanced
  5. Option: Root folder path
  6. Usually setting this to “Inbox” will do the trick.
  7. Confirm

Sorry, we can’t get that information right now. Please try again later. If the problem continues, contact your helpdesk.

Exchange online error: Sorry, we can’t get that information right now. Please try again later. If the problem continues, contact your helpdesk.

Solution:

  1. Log in to the portal of Office 365 through https://portal.microsoftonline.com/ with an administrator account.
  2. Click Add users, reset passwords, and more under users & groups.
  3. Select the “failed user”  .
  4. Click licenses.
  5. Uncheck the box of Exchange Online and click save.
  6. Wait for 15 minutes, re-do the steps above and check the box of Exchange Online.
  7. Click save and try again.

Managed Metadata Navigation not visible for Anonymous Users in SharePoint 2013

Unfortunately managed metadata navigation this doesn’t work for anonymous users of SharePoint 2013. The menu item and all children under it will not be visible, unless you define direct link:


  • Open Site Settings
  • Open Term Store Management Tool
  • Choose your Term Store
  • Open NAVIGATION tab
  • Enter URL in Simple Link or Header field
  • Confirm

Remove Sign In link from SharePoint 2013 welcome page

I recently made some customization for SharePoint 2013 website. One of the requirement was to remove default Sign In link from the top of the master page. There is no options in Site Settings for such a thing, and the only was is to use CSS code or to the something easier:

Find and delete the following peace of code:

<!--MS:<SharePoint:SPSecurityTrimmedControl runat="server" AuthenticationRestrictions="AnonymousUsersOnly">--><!--MS:<wssucw:Welcome runat="server" EnableViewState="false">--><!--ME:</wssucw:Welcome>--><!--ME:</SharePoint:SPSecurityTrimmedControl>-->

Get year of created date in a calculated column

If you need to extract year from created value, just create new column  and use the following formula:


=DATE(YEAR([Created]),1,1)


New column should be single text in order to use its value in views and filters, because date format is not supported.

Messages sent from a shared mailbox aren’t saved to the Sent Items folder of the shared mailbox in Outlook 2013

SOLUTION:

  1. Click Start, click Run, type regedit, and then click OK.
  2. Locate and then click the following registry subkey:
    HKEY_CURRENT_USER\Software\Microsoft\Office\15.0\Outlook\Preferences
  3. On the Edit menu, point to New, and then click DWORD Value.
  4. Type DelegateSentItemsStyle, and then press Enter.
  5. Right-click DelegateSentItemsStyle, and then click Modify.
  6. In the Value data box, type 1, and then click OK.
  7. Exit Registry Editor.